


Here I describe my astrophoto setup, my equipment, and imaging techniques. Links within this part are external and point to various dealers or manufacturers. You may notice my telescopes and most of my equipment are not new, but trusty old friends. This is the way I like it: I try to master all of my equipment and reach the best performance it can offer before moving on, and this takes years. Plus it helps saving cost in an expensive technical hobby.
Table of Contents:For taking most of the astrophotos found in this gallery I used 5 different telescopes:

| For wide-field imaging the JSO LS-12D, a (nominally) 125/475 mm Wright Väisälä Camera often referred to as a Wright-Newtonian telescope. This rather exotic catadioptric telescope is designed as an astrocamera with an ellipsoidal primary mirror, an aspherical front plate to correct for the resulting optical errors, and a flat secondary mirror to achieve a Newtonian-like focus on the side of the tube. It was manufactured by Japan Special Optics Co, a company that ceased to exist in 1996. I obtained my specimen used from a long chain of predecessors. With a measured focal length of 469 mm and a focal ratio of f/3.8, it is very good for imaging large nebulae and Milky Way structures, the results often having Schmidt camera-like quality. Its drawbacks are an inadequate drawtube and slight off-axis astigmatism. However, the latter can be used for precise focal plane adjustment. The front glass plate is prone to dew formation (or ice in cold conditions), so I use a dew cap in front of it, in the photo you can also see a dust shroud covering the front end during daylight. |

| For medium-to-wide field imaging the TS-Optics GSO Photon 6" F4 Newtonian with metal tube which I have fitted with a primary mirror baffle to improve its star images. I actually like the 0.5 mm thin stainless steel spider which provides good stability to the secondary mirror, although it causes large spikes. Due to the aperture ratio of f/4, this Newtonian is quite fast, but requires a coma corrector to work with photographically. Most often I use the TS-Optics Newtonian Coma Corrector 0.95x Maxfield, which reduces the focal length to 578 mm. The front end of the GSO Newtonian is covered by a dust cap in the photo. |

| For medium focal length imaging a 9.5" Newtonian with a nominal aperture/focal length of 250/1200 mm; actually measured as 242/1180 mm at an optical bench. Its optics were purchased from Orion Optics UK via Teleskop-Service, while the shiny aluminium tube assembly was custom-made by a mechatronics expert. The secondary mirror has a small diameter of 3.5". Its drawback are a reduced serviceablity of the main mirror because it can't be removed from the rear end of the tube (instead it needs to be removed from the front) and some faults in the main mirror coating which formed over time. I use two different coma correctors with this telescope: |

| Mainly to capture the colors of the stars, but sometimes for [OIII] narrowband imaging, I use a small TS-Optics Doublet SD Apo 72 mm f/6 refractor with Lanthanum glass objective. It uses a FPL53 glass element from Ohara (Japan). I use it in combination with an 1x field flattener which does not change the focal length. The focuser is a 2.5" dual-speed rack-and-pinion type. Since the small refractor is usually mounted on top of other telescopes, most often the 6" GSO Newtonian featured above, I use ajustable guidescope rings to hold the refractor in place. This way I can adjust the pointing of the refractor. The front end is ususally surrounded by a dew cap to prevent dew from forming on the front glass surface, as can be seen in the photo. |

| For visual observation, and sometimes also for astrophotography, the TMB 105 which is a 105/650 mm triplet apochromatic refractor with optics designed by Thomas M. Back (USA), manifactured by LZOS (Russia) and originally sold in Europe by APM Telescopes in Germany. My version of this refractor has a heavy German-made tube. For astrophotography, a flatfield corrector is mandatory, I use the flatfield corrector which was optionally sold with this telescope. It is designed for medium film format, so I use a custom-made adapter for my CCD and digital cameras. I have measured the refractor's effective focal length with flatfield corrector as 699 mm at a focal ratio of f/6.7, which I find a bit slow for astrophotography. Also, the focuser has no gear reduction for fine focusing. However, I used the TMB refractor successfully for lunar eclipse phototgraphy as can be seen here (YouTube link). |
Since I want to make the most of clear skies, which can be rare in Central Europe, I generally use three of the smaller telescopes mentioned above mounted parallel and on top of each other on an aluminium plate, each equipped with a different camera. I call this the "Triple Setup". The "Triplet" telescopes are: The JSO LS-12D, the GSO Photon 6" F4 Newtonian, and the Doublet SD Apo 72 mm f/6. There is also room for a DSLR camera with the Samyang 135mm telephoto lens (see below) on top of the JSO.

| Since 2022 I use a Skywatcher EQ6-R Pro SynScan mount for astrophotography. It has a total weight of 16 kg and is rated for loads up to 20 kg. It has GoTo capability with over 42.000 stored objects in its SynScan hand controller - however, for astrophotography, I exclusively control it via Notebook per USB cable. It is belt driven, resulting in minimal backlash. Telescopes van be mounted both via 3" Losmandy and 2" Vixen rails. It has a built-in Polar Alignment Scope, which is good enough for my applications. GoTo almost always lands me right next to the object I want to photograph. However, the 9.5" Newtonian plus finder-guidescope, camera, autoguider and other accessories push the EQ6-R mount to its limits. I would not load it with much more than that. The Skywatcher EQ6-R is a good standard mount used by many astrophotographers. |
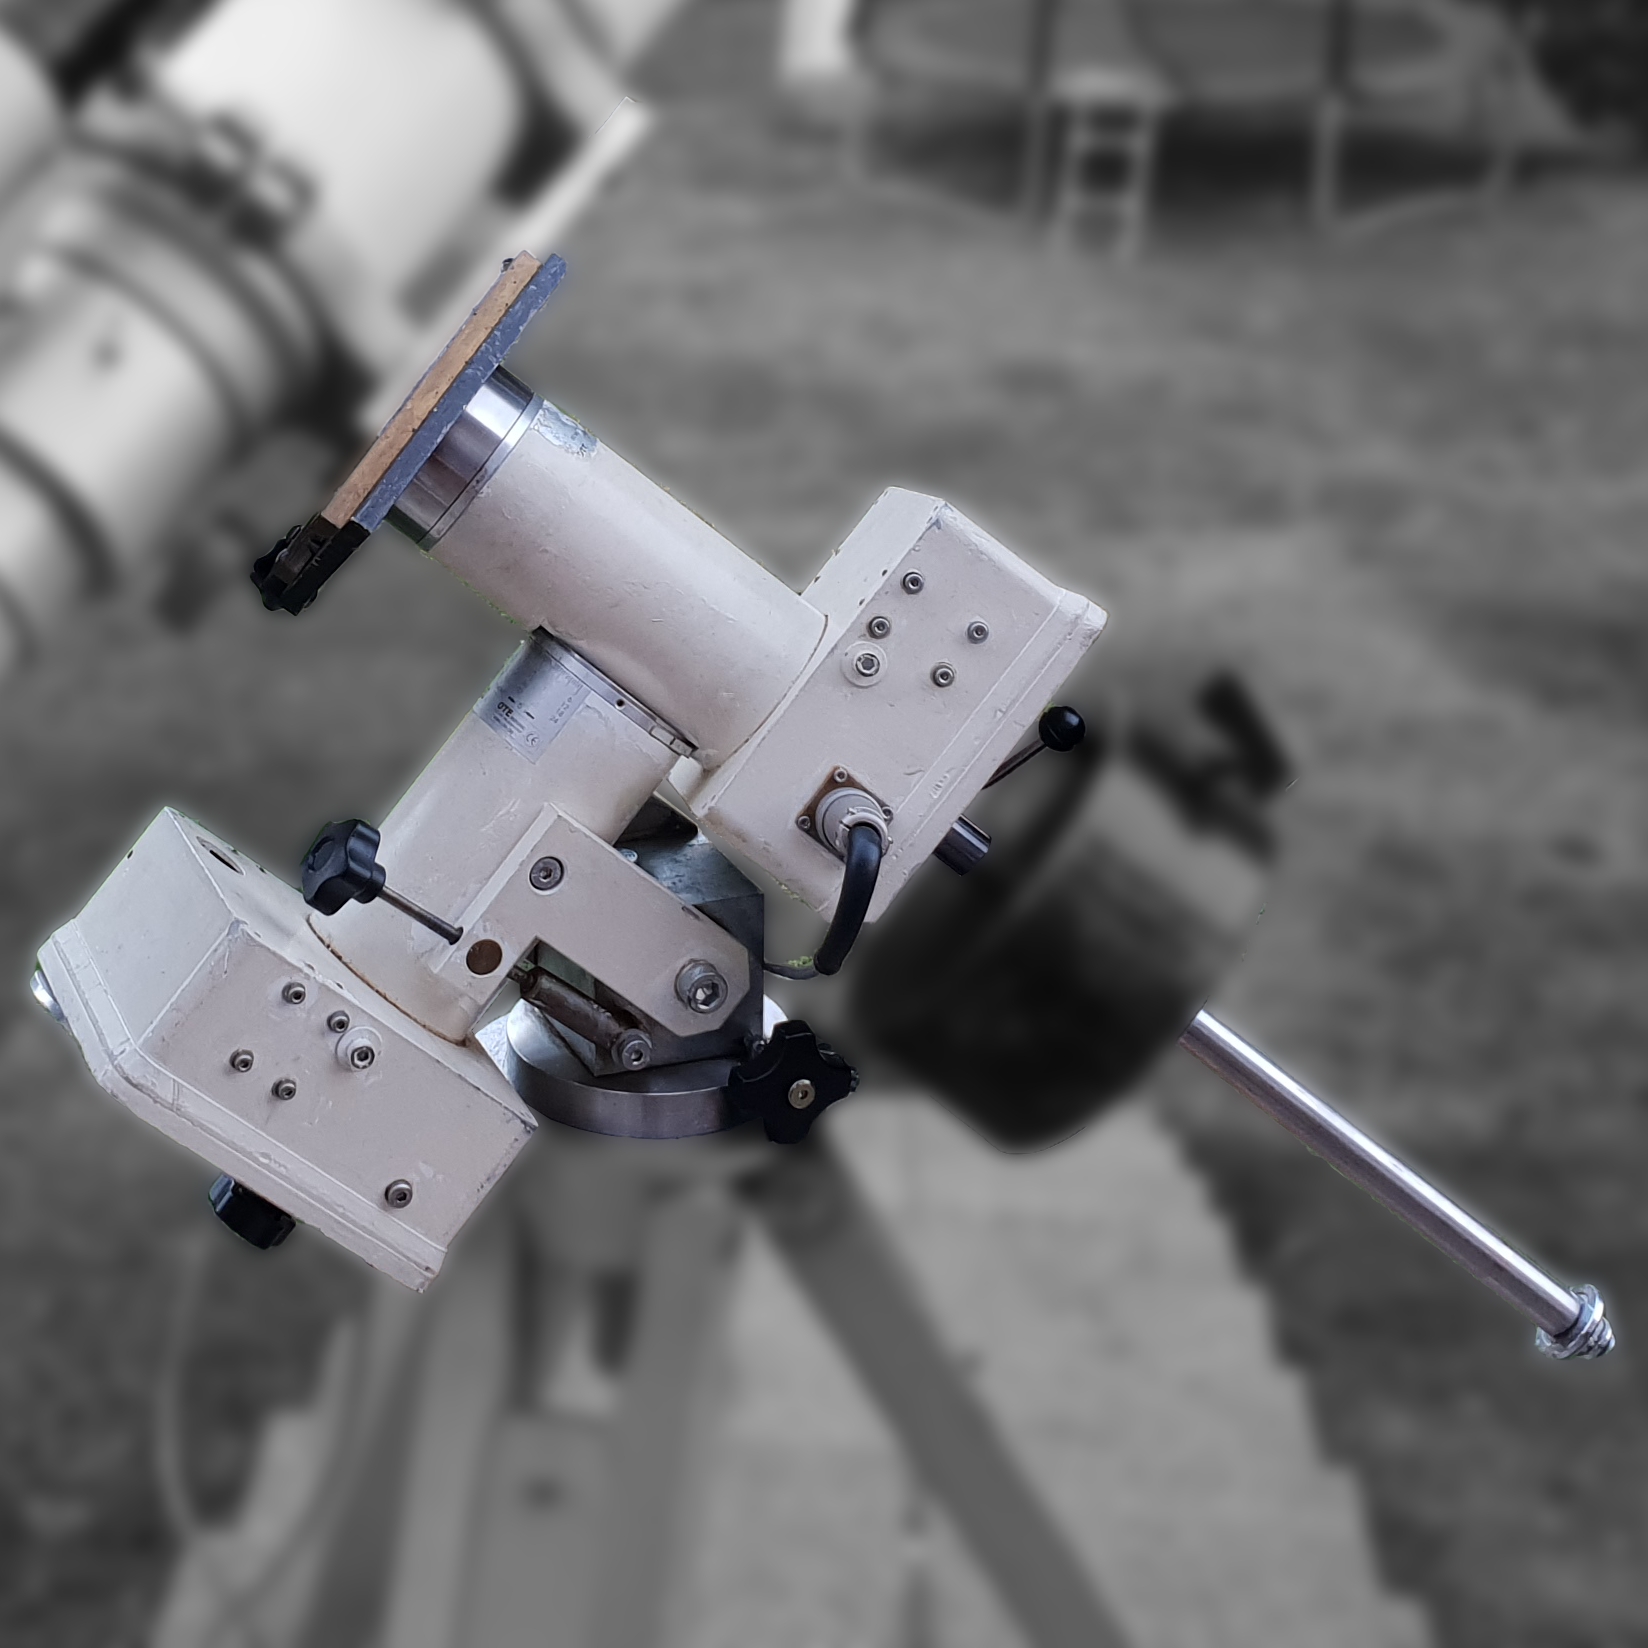
| My other mount and old workhorse for astrophotography is an OTE-150 (2002 version), which is a mid-weight German Equatorial Mount produced in Germany. It may not look attractive, but it is rigid, and its drives run quite smoothly with a built-in mechanical (!) periodic error correction. I have been using it for 20 years for taking my images. This mount handles most telescopes well, even under windy conditions, but is a bit on the heavy and unwieldy side. |
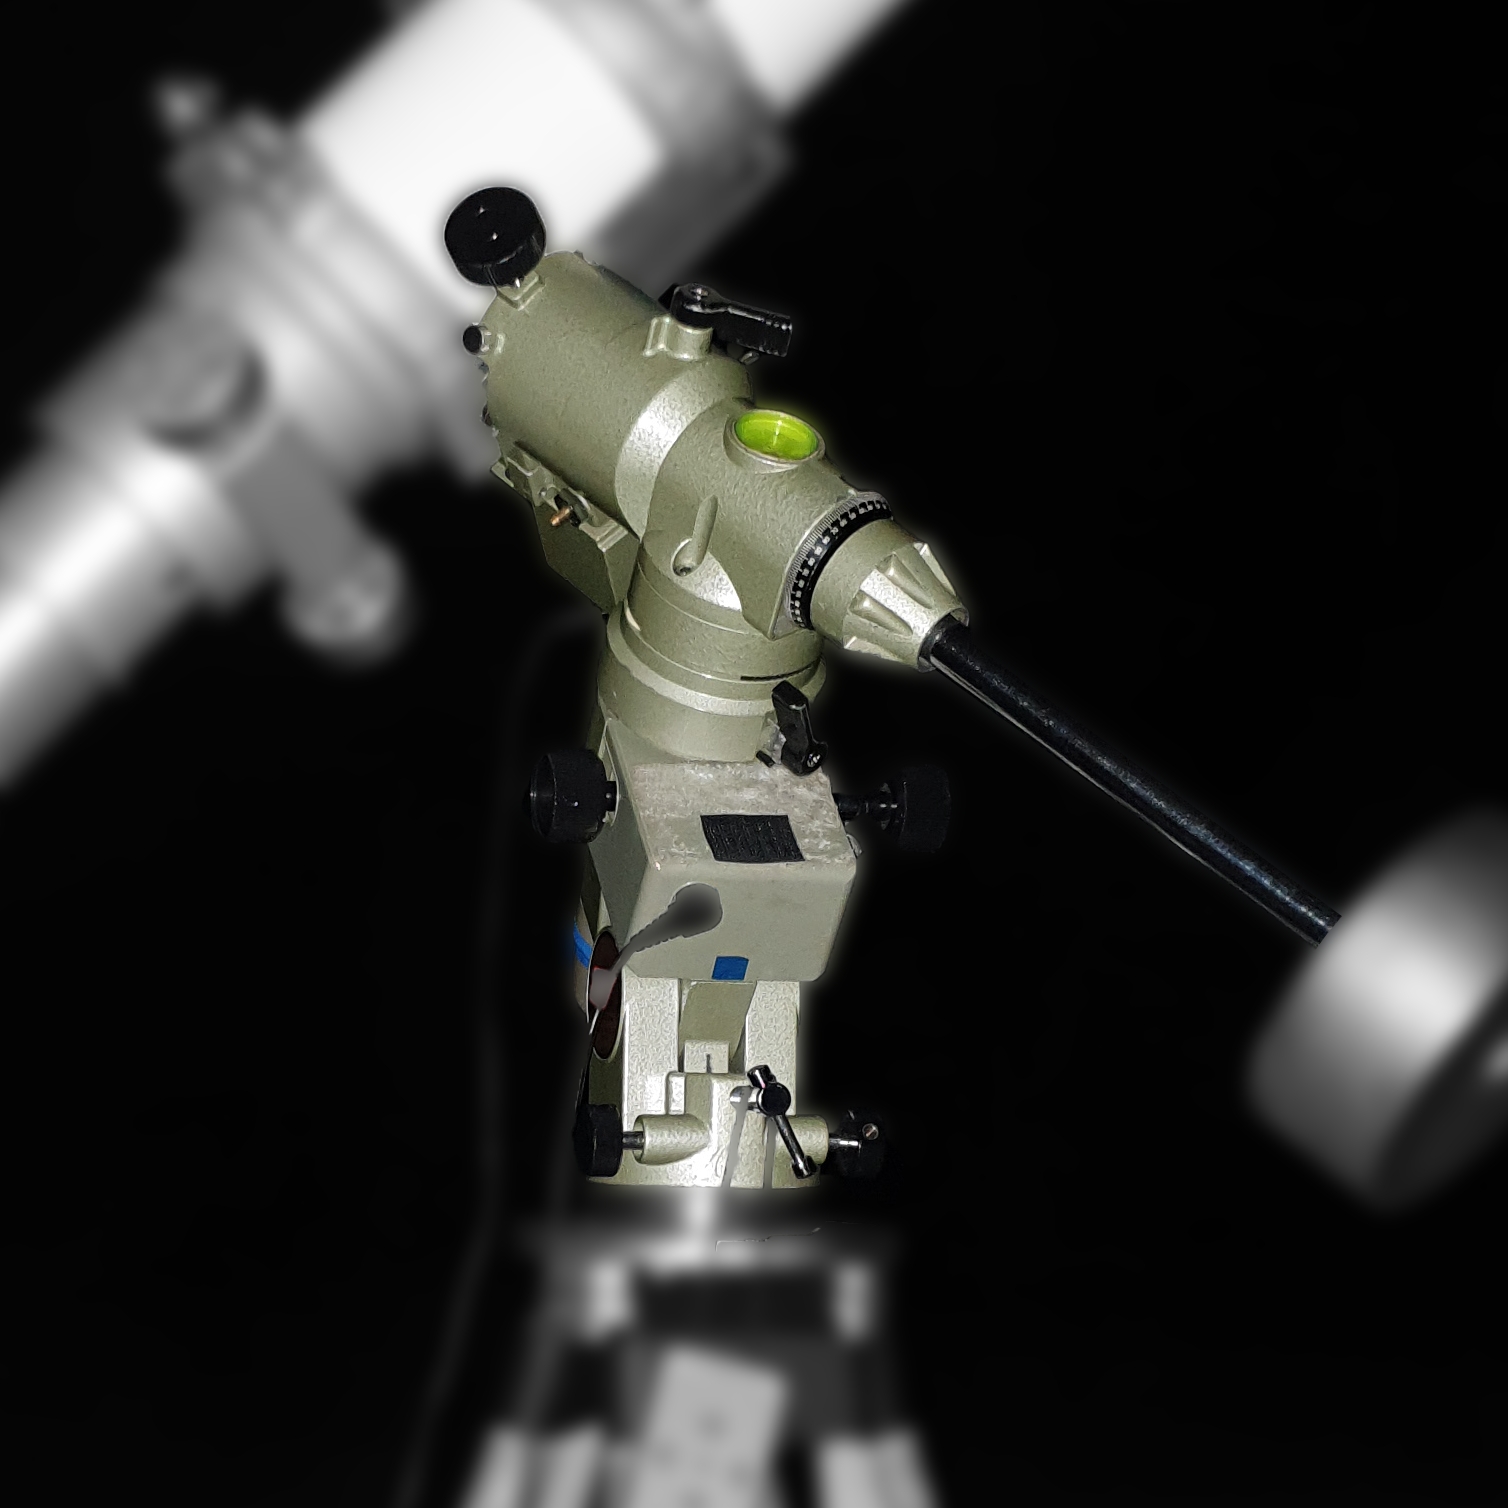
| The first serious mount I bought second-hand for astrophotography was a Vixen GP-DX. I still use it, but almost exclusively as secondary mount for visual observations, often with the TMB refractor. On rare occasions, the GP-DX serves as rotating base for time-lapse videos of the night sky. |
The Skywatcher EQ6-R Pro came with its own 2-inch stainless steel, 7.5 kg weight tripod. This works fine for me. The OTE-150 is mounted on a massive wooden TS Stativ Deluxe tripod, mine is designed to handle Newtonian reflectors and can be loaded (in theory) up to 120 kg. The GP-DX is mounted on a pointed Baader hard-wood tripod which I usually ram deep into the ground (if soft) to quickly damp any vibrations.
Currently I use four special CMOS cameras dedicated to astrophotography: Two monochrome and two single-shot color cameras.
| |

|
|

|
|
|
I cool the cameras to a standard chip temperature of -15°C. I have taken dark frames with all cameras for this chip temperature.
Often I am astro-imaging in my backyard at home in Vienna, where the sky is heavily light-polluted. Nonetheless, I image emission nebulae there, and do so using a set of 2" Baader Narrowband Filters, which consists of a Hα, an [OIII] and a [SII] filter with band widths between 3.5 and 8.5 nanometers, in combination with the monochrome cameras. Exposures of emission nebulae through all three filters can be combined to "Near Natural Color" or "Hubble Palette" color composits, although more recenty I prefer to combine the narrowband images with broadband color images taken at a dark site.
I am a "Nikon guy" in daylight and also use those cameras for astrophotograhy.
| |

|
|
Some older DSLR images which can still be found in my webpages were taken with a Nikon D70 camera, where I also had replaced the IR-cut filter, and which was my first DSLR, bought in 2004. Before that, I was astro-imaging with a Nikon F3 camera on chemical film.
For rough polar alignment I use the polar scope of my mount. Fine polar alignment is done using the declination drift (Scheiner) method with camera and notebook. Any camera control software which provides the ability to repeatedly download subframes around a star and offers a zoom tool will do. I quickly spot the star's drift when I put the mouse pointer over it and wait a few seconds, and I determine where north and south directions are in the camera's image by pressing the appropriate buttons of the hand controller or mount control software and watching the star move.
For rough focusing, I have marked the telescope focusers' drawtubes with the correct focal position for my standard monochrome camera with Hα filter. Fine focusing with is done manually using a Bahtinov Mask on a bright star within the frame. Most often I use a notebook for evaluating the star's diffraction pattern. Again, any camera control software which provides the ability to repeatedly download subframes around a star and offers a zoom tool will do, although I most often use N.I.N.A. (see below).
An alternative method I use at times for focusing the DSLR cameras employs the camera's LCD screens, with Live View and zooming in on a bright star as much as possible, and using a loupe.
When I have dark skies, the deep-sky exposure times are usually standardized to 5 minutes for individual exposures, with CMOS's and DSLRs. When I image through narrowband filters, I take 10-minute exposures.
To minimize noise in the final image I take a lot of individual exposures, often during several nights. I consider 10 hours of total exposure time a minimum for faint deep-sky objects, althought that varies depending on the number of filters used, the conditions and the object.

|
|
For each camera, each chip temperature and each exposure time I use, I take dark frames. Additionally, I take flatfields (and corresponding dark flats) to correct for uneven illumination caused by the optics. To capture flatfields I use a Lacerta LED Flatfield Box with a diameter of 283 mm set directly in front of the optics. Flatfields should be taken every night, ideally during or immediately following the astro images, to be able to correct for uneven field illumination and dust spots on the optics as accurately as possible. Dark frames need only be taken once or twice a year, no telescope required.
I use for the most part free and open source software.
The EQ6-R mount is controlled by the Green Swamp Server (GSS). My planetarium program of choice is Stellarium which can point the mount via the GSS. I can also recommend Stellarium as app for the mobile phone. For image acquisiton, I use Nighttime Imaging 'N' Astronomy (N.I.N.A.). It took me some time to get acquainted with N.I.N.A., and to learn all its features and settings, but it is versatile and powerful, and has native drivers for nearly all current cameras, mounts, and guiders (including the MGEN-2). For astrometric plate solving, I call ASTAP from within N.I.N.A. For image calibration, registration, and stacking I use the DeepSkyStacker. For separating stars and background to process stars and background independantly, Starnet v2 works fine. Further image processing is done in Adobe Photoshop.
Image Processing: The usual steps are: File selection and dark/flat calibration, star alignment and image integration, background flattening, noise reduction, deconvolution, non-linearization, star-background separation, star size reduction, local contrast enhancement, color and narrowband blending (if applicable), re-adding of the stars.
Images of planets, the sun and the moon were taken using the 9.5" Newtonian. Since the spring of 2010 I use an Imaging Source DBK 31AU03.AS single-shot color camera for planetary imaging, which features 1024 × 768 pixels and can be run at 30 frames per second (fps). A Televue 5x Powermate boosts the effective focal length of the telescope to about 6 meters for small planets. Older planetary images were taken with a Philips PCVC 740K webcam.